
By Petra from A Mum Reviews
We have just started a new feature wall in my house and the idea is that it will be a wall of mix and match photos, images and illustrations that reflect my family’s life and passions. It’s a feature wall that will gradually grow as we add more pieces of art and photos to it.
For the start of the wall we ordered four slim canvas prints – three that are 8×8” big and one that’s 12×12”. You can start with anything as long as you start in a place of the wall that allows you to expand the picture feature.
The canvas prints arrived a few days after I ordered them. They were individually packaged and well-protected. The small canvas prints were wrapped in plastic and the large one in a soft cover.
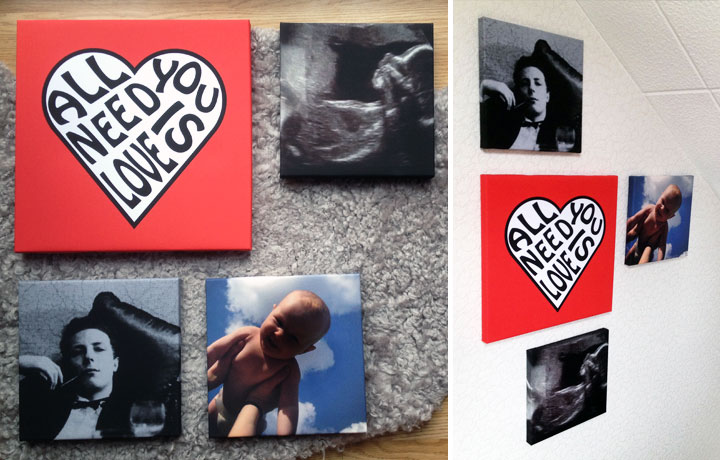
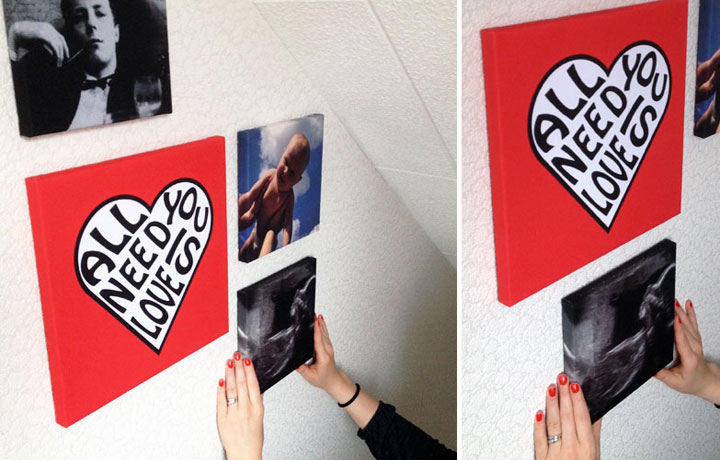
The four prints we chose are some of my favourite images and that’s exactly what this kind of wall is all about. The large one is one of my own Cleopetradesign illustrations/designs and the three small ones are very important photos – our 20 week scan photo from when I was pregnant with our daughter, a really old photo of my late father when he was about 20 (60 years ago!) and one of my absolute favourite baby photos of our little girl. The pictures are all very different but somehow go together really well.
I think it’s important to have a diverse mix but also something that ties the images together. These four are all square and on the same canvas style and that helps bring them together. The scan photo and the one of my dad are both low resolution, black and white and also quite dark which makes them look good on the same wall but I wouldn’t put them next to each other because they are too similar. (Low resolution images can often look very good on canvas since the texture of the cloth hides it quite well.) I also like the bright blue and red combined and those two colours are something we’ll look out for when we are choosing the next images for our wall.
We are using our stairwell wall for our mix and match feature since it’s a nice unused area that was quite boring with just white wallpaper. White walls make great backgrounds for all kinds of art, too.
I had an idea of what I wanted to do but for bigger projects like these it’s good to have a well thought through plan so I decided to draw a sketch of the wall on my computer and play around with our design options. You can, of course, do this by hand too but on the computer you can easily insert the actual pictures that you want to use and adjust the sizes and move them around.
After creating a few options and seeing the prints in real life, we decided on this plan:
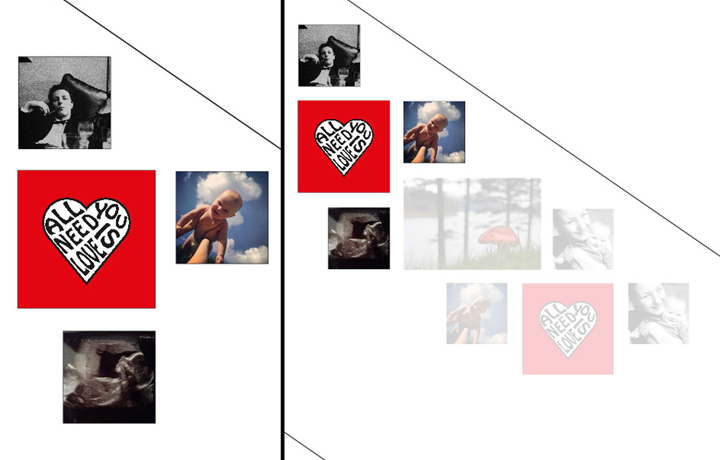
The left side shows our current four canvas prints and the right side shows an example of how we could expand in the future.
We are building from the very top of the stairs downwards. This seems to be the best way when working on a wall like this one. If we were to work on a regular wall, we would have started in the middle for a well-balanced look.
All you need to get the pictures up on the wall is:
- Nails
- Hammer
- Tape measure
- Spirit level
- Clean hands! Canvas prints are delicate and you don’t want to leave any fingerprints or marks on your new prints.
I asked my husband to help me because I’m not good at putting things up on the wall. It’s good to work together when doing this task so that one of you can help guide the other to make sure the pictures end up in the right place and line up correctly.
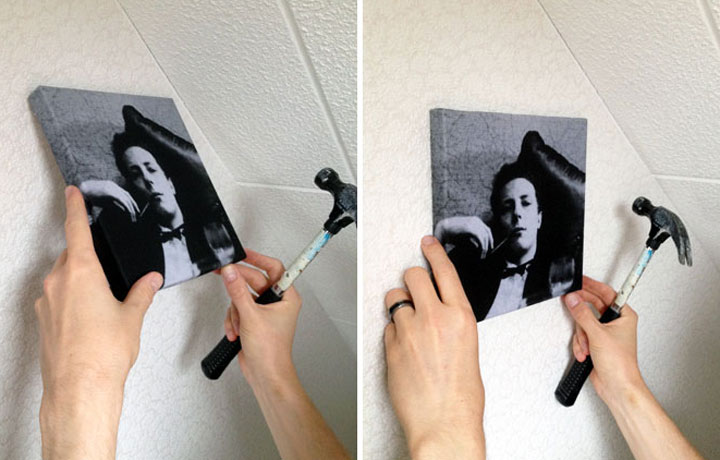
Even though we had a plan, it was not set in stone and as we were putting the pictures up on the wall we played around a bit with possible layouts just in case something else looked better when the pictures were actually up on the wall.
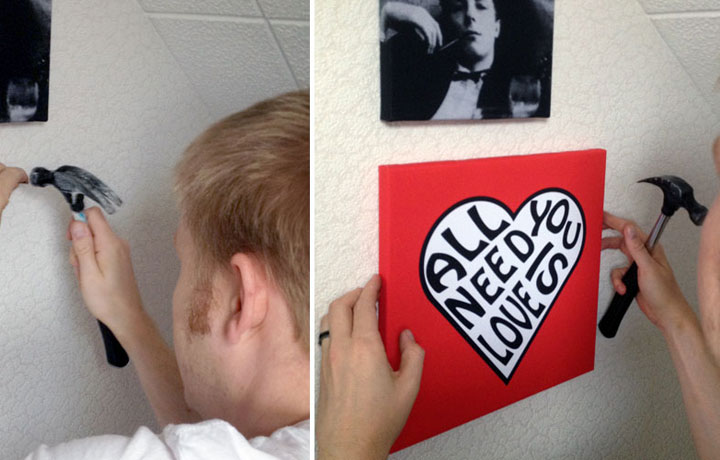
We used one nail per canvas which is the easiest way to do it. If you want them to hang more steadily you can use two (one in each top corner) but that requires a lot more measuring and they need to be exactly level. It makes it much more difficult to align the pictures to each other too. When you use just one, it’s easy to adjust the way the picture hangs.
It’s a good idea to measure the gaps between the pictures to ensure they are right but sometimes you need to use and trust your eyes and adjust according to them and what looks right.
For a neat look it’s nice to align the pictures on some edges. We’ve aligned the red large print and the small one of my dad to the left and the one below to the right edge of the large red one. The one of my daughter is aligned to the top of the red one and the gaps between the pictures are all 4.5 cm.
Here’s the result – the start of our new feature wall:
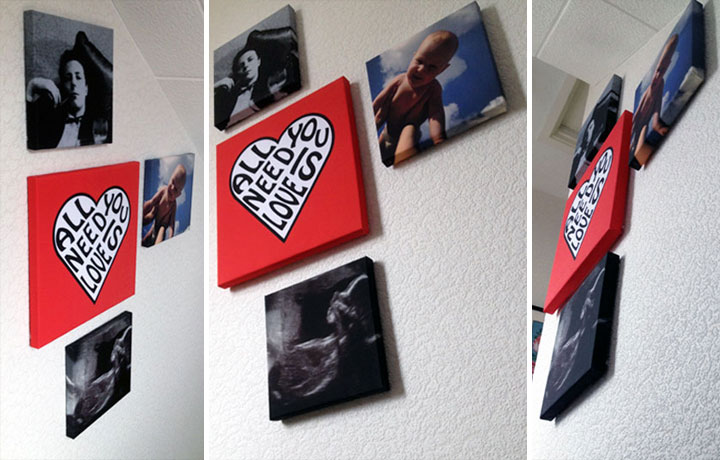
We are really pleased with the result and think it looks lovely. It looks great as it is now but we can also see how we would like to expand it further and add some more of our favourite images!
Explore our range of canvas prints
What did you create on Snapfish? Share it with us on social media! You can tag us with @snapfishuk in your photos on Instagram or Facebook or use the hashtag #snapfishuk. Don’t forget to follow us on YouTube, Twitter and Pinterest, too. We love seeing what you create.